 |
 |
 |
 |
 |
|
Patches are fully removable,
interchangeable and reusable.
|
||||
|
What
comes included in the Basic Kap Package
|
|||
|
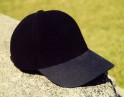
1 - Headliner
Kap
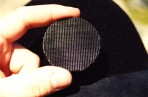
2 - Self-adhesive hook fasteners To order more self-adhesive hook fasteners, please see our order page for prices. |
|||
|
How
to create and apply RIPPZ & patches to Kap
|
How
to remove RIPPz & patches from Kap
|
||
|
STEP 1: Use scissors to cut pieces out of the supplied self-adhesive hook fastener material. Cut one or few larger size pieces for better grip or cut many smaller size pieces to conserve on the hook material. Use the biggest piece you can...don't be cheap...it looks better that way! |
STEP 1: Use one hand to securely hold around the bottom rim of the Kap. Your fingers should be in the inside of the Kap and thumb on the outside. Get your fingers as close to the edge of the patch as possible. | ||
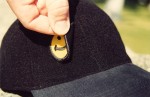
| STEP 2: Remove the self-adhesive backing on the hook material and immediately stick to the back side of your patch. If using many smaller pieces, place the pieces near the edges and center of the patch. | STEP 2: While securely holding the Kap with that hand, use you other hand and grab the edge of the patch and pull it back. You may have to pull a little firm while doing it. If it's a RIPP, try not to bend it. | ||
| STEP 3: While supporting the inside of the Kap with one hand, firmly attach your patch on to the outside of the Kap's surface with your other hand. In other words, just hold the thing tight and slap it on! | STEP 3: The patch is off and you're ready to put on another one or two or three.. Experiment a little an have fun! Basically, if you need help with any of these steps, please ask the assistance of someone more intelegent than yourself. | ||